TO STAY CONNECTED BETWEEN POSTS FOLLOW ME ON
Instagram @ fortheloveofahouse
Showing posts with label stone. Show all posts

Monday, July 18, 2016

around the house a.k.a. keeping it real


So, early spring this happened...  
ouch :(


The terrace was expanded and completed as we were finishing up the barn renovation HERE in the spring of 2011.  (You can see the "renovation photo story of the terrace" HERE)
Later that summer hurricane Irene tore through New England and the wall was never the same.  I cannot complain too much however, as the initial tracking had the hurricane coming directly through our small village.  To see our location as a red dot on a weather tracking map being in the direct line of the hurricane was a fear I will not soon forget.  Irene changed course the night it was to hit southern New Hampshire and instead went on to devastate Vermont.  The damage to Vermont was shocking and heartbreaking, so I really can't complain that my stone wall was damaged.


The excavator man who did the initial stone wall and terrace wall came to repair the wall after Irene, but over the last several years there was more settling and movement of stones in the walls.  While perforated plastic pipes were placed in the initial construction for water run off  Dan decided that french drains would help abate the settling situation by addressing the rainwater drainage issue.  I had no idea how this wall would be repaired.  When the wall was initially built the huge granite cut-stones that were set into the grass for steps down to the garage/motor court hadn't been placed yet, so it was not like we could bring an excavator in to do the job.  Dan contacted the man who did our french drains around the farmhouse and after weeks of calling him, he comes out, agrees to the job and then drops the ball and is a no show.  At this point Dan decided to do it himself;  he had a plan.  I didn't ask how the plan would work as the whole situation was really bumming me out, so I put on my "rose colored glasses" and decided it would be fine!  On a walk with the girls a day or two after deciding he would do the project himself we had a very fortuitous chat with a neighbor.  Adam had just graduated summa cum laude and was taking the summer off before going for his masters in business.  He casually mentioned wanting to work some for extra money, but didn't want to work all summer long.   We knew he was a really good worker and that Dan would need help on the project, so it was a win-win!
This is cute Adam doing the dirty job of digging the trench for the french drain.  To say he is a hard worker is a ridiculous understatement; he is a nonstop powerhouse.  Millennials get a bad rap these days, but this one has an amazing work ethic.  That he and Dan worked so well together made the whole project go smoothly.


The trench for the new french drain.


 They followed the line of the original drainage pipe, so basically we now have a french drain set over a perforated drainage pipe.  They found the original pipe had been completely crushed where the pipe drained from the wall, so the new french drains should rectify the situation.  Yay Dan!


Look at those crazy piles of pea gravel.


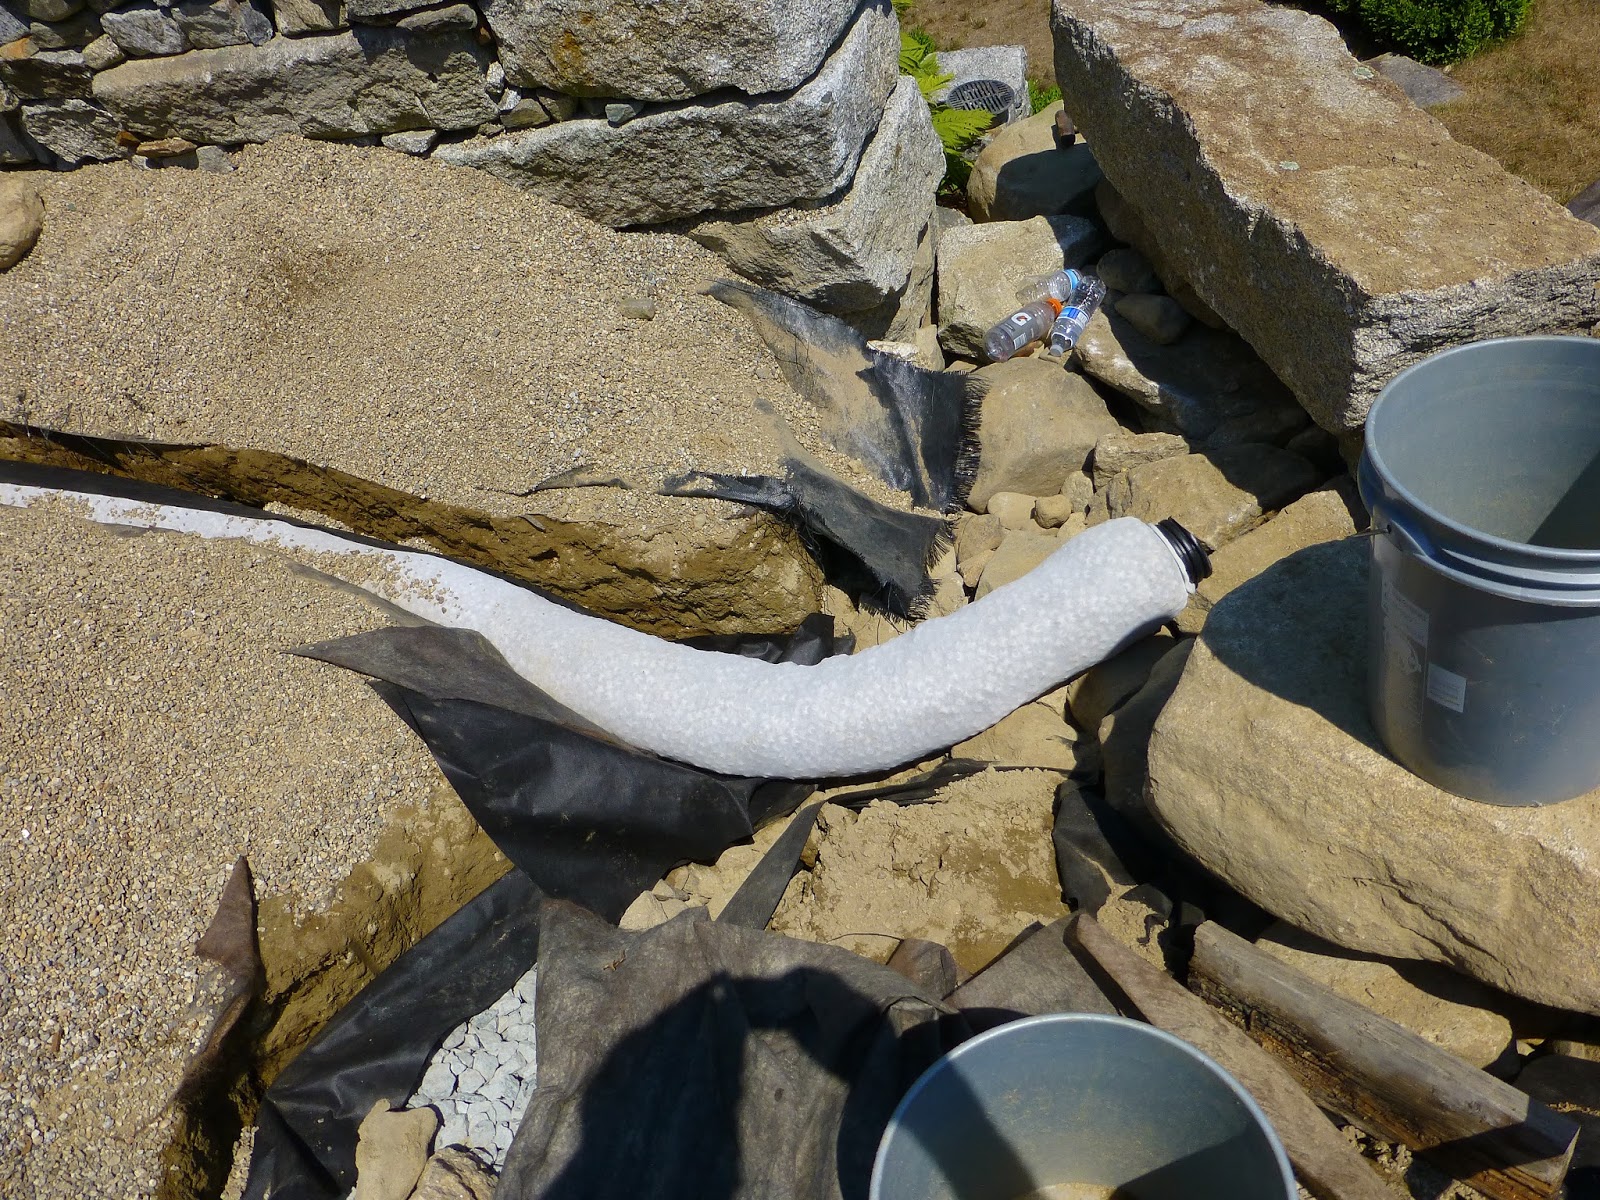
Another drain was needed running from the north french door of the barn room to the corner of the stone wall.  The pre-made corrugated french drain pipes are from Lowe's and made the labor on this trench so much easier (at least that's what I heard;)  


The rebuilding of the stone wall.  Gotta love a handy (and cute) husband!


I decorated the yellow fertilizer spreader on the back of Big Blue with some large caribou antlers.  Doesn't it look nice?!!!! :)  I'm just joshing with you!!!  Though some who know me would totally think I would do that:)  The antlers have been in the garage forever, needing some rough ends cut  and they ended up in spreader to get them out of the way!  During the project Dan would drive Big Blue (on back roads:) to a rock quarry about 5 miles away to get scoops of stone for the project.  On one trip someone stopped him to ask him what he had in the spreader! 


Of course it was super hot on all their work days.  This day was 88 and wicked humid.  I was in charge of ice water, iced tea, lunch and beer, aka "mason juice" delivery to the job site :)  I was also in charge (self-appointed, of course) of reminding them to reapply sunscreen every 2 hours.  What would they have done without me?!!!;)


Making the finishing touches.  Ah- mazing repair!  I'm so proud of Dan, and Adam too- he had never worked with stones and was a natural.  They did a craftsman-worthy job on the wall.


The boys finishing up spreading the pea gravel.


I took this photo as I was sitting in a chair with a margarita "stupervising" and "helping" them finish up.  I think they really appreciated my contribution:):)!!  As I wrote on IG... this is how you know you are old- when you have a cute 21-year-old working shirtless, at times, for you and all you can think is "Is he wearing sunscreen?!"  lol  Hence the sunscreen on the table, cuz no he wasn't!!!  There will be no sun damage on my watch;)


The two cuties congratulating themselves on a job well done!
After getting his MBA Adam has plans to go into medical device/medial equipment sales, so if you or someone you know needs a super smart, personable, creative, extremely hard-working, all-around good person and cute salesman I can put you in touch!


The "almost" finished wall;)  Still some tweaking to do, but it's back together and stronger than ever.  We had a big rainstorm this afternoon and the new french drains worked like a charm!
(this photo is really pinky as I just took the photo at dusk and the sky to the east was very pink)


With the terrace back to its former glory we can now get back to cocktails on the terrace enjoying views like this!


Now, on to the next big project... which is having several sides of the farmhouse painted.  As Roseanne Roseannadanna would say, "It's always somthin' !"
What have you been up to this summer?!


Monday, September 21, 2015

this year's terrace


Cooler fall temperatures have finally decided to grace us.  It has been a warm and humid summer and the central a.c. has been running constantly.  It is so nice to be able to have all the windows open and a bit of a chill in the air.  You have to look hard to see any leaves turning yet, but if you look closely they are there and fall is definitely on her way!


I wanted to show you the barn terrace this year.  It also helps me to document what I did (planting wise) from year to year.


Last year we added the outdoor wicker club chairs.  We loved them so much that this year we added matching ottomans which really kicked up the comfort level since we spend so much time here in the spring,  summer and fall.  The can see how the grey cabana stripe pillows  are a carry-through from the pillows in the summer barn room HERE. 


I used peach verbena in the stone wall iron discs, and mixed them in with other plantings throughout the terrace.  I love the color and that they bloom all summer.


Antique zinc dovecote and iron fence piece outside the south barn room french door.  Antique iron urns and white-pained concrete finials flank both french doors on either side of the fireplace chimney. 


This year I placed ferns in the two corner jardinieres.  I have loved them and will definitely do them again next year.  They were marked Kimberly Queens, but I believe they are actually Macho ferns, which were a favorite of ours when we lived in Dallas.


My photog assistants for this shoot :)  Magnolia (on the left) and Louise.  Ella had grown bored with the project and wanted to go inside!


Door to the kitchen mudroom.  Boxwoods are overwintered in the basement.


I was expecting the verbena to be more orangey, but love how the color ended up matching the antique oil pots.


View to the back meadow.
Rosemary was planted in the large white jardiniere. It's lovely to have the scent of the rosemary when sitting on the terrace.  Francee hostas in Italian terracotta pots.  I've had the black umbrella for a good 16/17 years now.  Small votive candle holders hang off cup hooks under the umbrella canopy.  Japanese fishing floats are scattered around the terrace pea gravel (small white ball is marble.)
All this picture needs is a cocktail and three puppies to truly tell the story of evenings on the terrace ;)
Hope you have had a wonderful summer and are ready for the arrival of fall.  It is, of course, the most beautiful season here- along with winter, spring and summer!!! :)
Happy fall ! 


To view posts of the summer terrace over the years click HERE


Tuesday, July 16, 2013

the terrace wall bed


So.... here's one of the too-many-to-count exterior projects we've been working on this summer.   It's not complete, but I thought you might like to see what we've been up to just in case you were thinking we've been sitting in the barn room eating bonbons!
This is the "terrace wall bed."  The dry-stacked stone wall was built during the barn renovation several years ago.  This area is seen as you drive up the gravel driveway that leads to the garage (which is under the barn room.)  The last couple of years we've been landscaping areas on the front of the house and at the road, so up until this spring I really never gave this area any attention.  Every time I thought about designing this area I drew a blank.  We constantly use the granite steps coming down from the terrace, so I knew that we needed to extend the path somehow, but again I was focused on other areas and just couldn't "see" it, so I decided to save this project for this year.
The wall itself has two tiers for planting.  We planted the river birch almost two years ago.


Earlier this spring I finally came up with how I wanted this area to look and the design.  It started with a boxwood lined path down from the large granite steps. I have several varieties of boxwoods in different beds on the property and I really like the Green Velvet boxwood.  I chose this variety as what I wanted to use to line the path.  Several days later at Costco (of all places) what did I find, but Green Velvet boxwoods!  I had to make two trips one morning to get all 27 home (also planted some in pots)! 


Dan and big blue then prepped the area. 


Love a clean slate.


We contemplated using antique bricks that were removed from the dining room chimney during the renovation, but we worried we didn't have enough and Dan really wanted to use antique cobblestones, so we did.


The large pile of dirt behind Dan is "screened" top soil that we have delivered, and then the small pile is the "good dirt", as we call it, that has been amended for planting.  We've always mixed our own dirt (here and in Dallas) when landscaping and I think that is a big factor in our success rate with new plantings.  (Let me know if you're interested and I can do a post on our mix and planting process.)


The walkway follows the same curvature as the granite steps leading down from the terrace.


I initially thought I would use gravel for the path, but with the stone wall, the cobblestone edge, the gravel drive... it was just too much stone, and we decided to lay grass between the cobbles. 


Our gardening assistant!  Couldn't do it without her;)  Notice the trees behind Ella.  I've been obsessed with wonky trees lately, and these will come into play a bit later.


But wait....  having gardening A.D.D., Dan mentioned the idea of lining the edge of this front bed with stones as a way to keep the bark mulch out of the gravel drive.  I realized I did have enough old bricks for this project and, of course, it then needed to be done immediately!  Do you experience gardening A.D.D. too?!  For the record;) I laid all these bricks.... just sayin'!


Back to the terrace wall....  the boxwoods placed for planting.


One side planted!  You can also see that the tier-beds on the wall are slowly (as I find plants) being planted.  They are all perennials in white, blue, light pink, purple and sage colors.


If you're in southern New Hampshire, Dan highly recommends Tim's Turf in Litchfield for grass. After ordering, the grass is literally cut and rolled from the field the night before you pick it up (as opposed to Home Depot's or Lowe's where it bakes in the sun for days;)  The price and quality are both far better than HD/Lowe's also.  Tell Tim, Dan sent you!


The cobbles at the gravel drive haven't been set yet, so that is why the grass isn't finished on this end.


Lest you think I only design, supervise and photograph)...  I am also the manual labor!  It was in the 90's on this planting day.


So, we still need to finish the grass, then between the boxwoods and the stone wall I want to plant Bombshell hydrangeas.  They stay small in height, so they won't hide the wall.  I need about eight to ten 1-gallon plants to fill the space, but can not find any.  (I did find 3-gallon ones for $40, but with the amount I need that's out of my budget.)  If you're in NH/MA/VT/ME and you run across any 1-gallons please let me know.  Will drive for plants!


Closeup of the perennials in the stone wall (prior to mulching.)


To the left of the boxwoods, three of my wonky trees:  Chamaecyparis obtusa Gracilis, or Hinoki False Cypress.  They will stop your eye from going straight ahead when you approach the garage area and guide your eye up the path and granite steps to the view beyond.


And since that project is almost complete, it lead to the next one....  Last weekend we went for a drive to take a break from yard work and what did we do, but stop in a nursery (looking for the bombshell hydrangeas) and found some gorgeous Canadian hemlocks to plant along the inside of the meadow at the road (think winter privacy.)  They're large, so it entailed renting a mini excavator to dig the holes.  It's 91 degrees today, and no one wants to be digging holes!  


I overheard Dan telling someone the other day that when it comes to the yard work, we don't have an "off" switch.

Soooooo true!
(I can see all of you nodding right now;)


Thursday, September 6, 2012

antique cobblestones at the entrance

So, lest you think we've just been sitting around on the porches all day eating bon-bons ;), I thought I would show you what we've been up to... our latest project!  If you follow me on Instagram (which I'm loving btw, you will have seen some of these photos.  I try to post once a day on sightings/happenings around the house, or places we travel to.  If you don't have a smart phone you can still see the current photos at the bottom of the blog.  If you would like to follow you can find us at "for the love of a house".)


This is our entrance from the street that I showed you most recently.  You can see the "brides" (Endless Summer Blushing Bride Hydrangeas) planted behind the granite curbing.  You can also see how the edge to the gravel drive has lost its shape after being driven on and plowed over!  Although I didn't love how it looked it has never really been an issue since we had yet to landscape this part of the property.  But, knowing that we are working our way down from the farmhouse I wanted to address this issue.  It was decided that an antique cobblestone border would be the perfect (and period) solution to keep the gravel in the driveway!


Ella helped us pick out the antique cobblestones... couldn't have done it without her! 


I love working with stone and was Dan's hod carrier on this project which was a two-person-on-deck-at-all-times project!  Minute changes in the angle of a single stone changes the entire curvature of the line, so working the line required constant tweaking and decisions to be made... and re-made, over and over!     


Dan and Big Blue bringing the cobbles to the job site.


I drew the curve on the dirt and Dan dug the design first with a pickaxe and then a shovel making a channel for the stones to sit in.  He then put down a base of granite dust (also referred to as stone dust) which is granite crushed to a very fine consistency and is used for setting stones.  It allows for water to easily pass through and once wet it helps to lock the stones in place.  New cobblestones have a more consistent size, but antique cobbles can vary greatly, so the granite dust allows you to add or subtract the base to get all the stones to the same height.  At the street the stones are flush with the road, but as you come up towards the stone beehives it has a small lip to contain the gravel.


New fill dirt added behind the edge which will eventually (hopefully in the next week) be planted with grass.  This south side of the project was a breeze!  From start to finish it took only 4 hours; the north side was a bit trickier!


One side completed, one to go! 
For scale it is 16 feet between the beehives.


This side proved to be more difficult and took two days to get right!  Day two we even worked in the rain to complete the project before Dan had to leave town!   On this side of the drive Dan had to first use the pickaxe to remove asphalt left over from a previous driveway on the property- you can see the pile on the left.  Then, trying to get the curve to match the installed south side was a big challenge.  Dan found the center of the drive and used mathematical measurements, but that wasn't working.  Eyeballing it wasn't working either.  I decided to draw the start of the completed curve on some thick bubble wrap, cut it out and flip it as a pattern for this side (this was the day it was raining, so regular paper wouldn't have worked;)  That got the ball rolling and the rest of the project went pretty smoothly after that.


Stone beehives as command central!


So, once again...
 before


after! 
Once the grass is put down you really won't even notice the cobbles, but it's a subtle improvement and a detail that looks like it could have been installed a hundred years ago.


And, for the record... apparently the "house angels" like Dan more than me as my Endless Summer Blushing Bride (white) Hydrangeas are turning blue!  I wanted this bed to bloom white and Dan was partial to blue.  The gardener (me;) chose white!  I do admit that this icy blue is a gorgeous color, so don't tell the house angels, but I'm happy too!


 This is the "runaway bride" hidden in a little clearing in the trees several feet down from the other "brides".  When the brides get all droopy and cranking needing water we call them bridezillas!